Pages

Sunday, March 18, 2012

Our Newest Addition: Aquaponics

Pin It
Started on 2/14/12 - Joni's Valentine's present...
Aquaponics, what is it? It is growing plants and vegetables using fish to supply the nutrients for growth. My wife and I have been growing vegetables in our backyard for the past eight years. We began gardening to have better control over the food we put in our bodies. I am sure, if you are reading this, you too must be looking for a way to provide better food than what is available in our stores. We constantly hear about all the chemicals that are used in our food. It’s kind of scary if you look too deep into what goes into the processing and growth of our food supply. Anyway, that’s not what this bit of information is about. It is about helping you grow your own food in your own backyard, porch, balcony, or inside a room not being used.

Living in sunny Florida can be a challenge when it comes to growing vegetables successfully. There are bugs, torrential rains, heat and sand instead of dirt… just to mention a few of the challenges! We have Earth Boxes, No-Dig gardens, Auto-Pots, Square Foot Gardening (raised beds) and Hydroponic systems. Each has their advantages and disadvantages and we will cover each of these in future posts.

Not having a 100% success rate with any of the above systems, I began to look for yet another way of growing food. This is when I came across Aquaponics. After doing a little research I decided to give Aquaponics a try. There is a wealth of information on the internet and several websites that have been very helpful. (I will list the links at the end of this article.) There are a number of reasons for giving this a try. However, know going in that there is a little more than just sticking a seed in and waiting for it to grow. By doing a little homework and reading, you can save yourself a bunch of headaches and failures.

Everything is thriving...
I suppose this is where you decide to either buy a system or build your own. I prefer to build my own for the same reasons I grow my own food, self sufficiency.  I chose to begin with a small system, very basic and not a lot of expense. The construction part is probably the easiest part of Aquaponics. I put together my Aquaponic system with just a few tools and some parts which can be purchased at a local hardware (Lowes, Home Depot, etc.). Like anything - I guess you can jump right in and construct a big system or just try a small system to keep the learning curve short and not too expensive. Let’s get to the guts of the construction process.

First, I decided to go with a growbed 2 feet by 3 feet by 8 inches deep which gives 6 square feet of growing space. Perfect for a patio salad garden! Those familiar with square foot gardening will appreciate this. As with a square foot garden, my research revealed that you can grow more plants in a smaller space with Aquaponics. I purchased a mixing tray from Lowes. Most of the research suggested a depth of at least 10 inches, but I couldn’t find one that met these measurements so I went with what was available.  So far - no regrets with this tray.

The growing media for our tray is a mixture of Hydroton (expanded clay balls used in soilless growing systems) and pea gravel. You can use lava rock as well. It is important to make sure the media you choose doesn’t have limestone in it, because it makes the Ph too high. You can test the grow media by placing a little of it in white vinegar – if it bubbles then there is limestone in the mix!

Next, you will need something for the fish.  The system is on our patio, so I wanted something that was pleasing to the eye. I purchased a large planter pot which held about thirty gallons of water.  PVC pipe and fittings round out the main components of our system. All that was left was to add a few gold fish, air stone, pond pump and presto – we were in business.
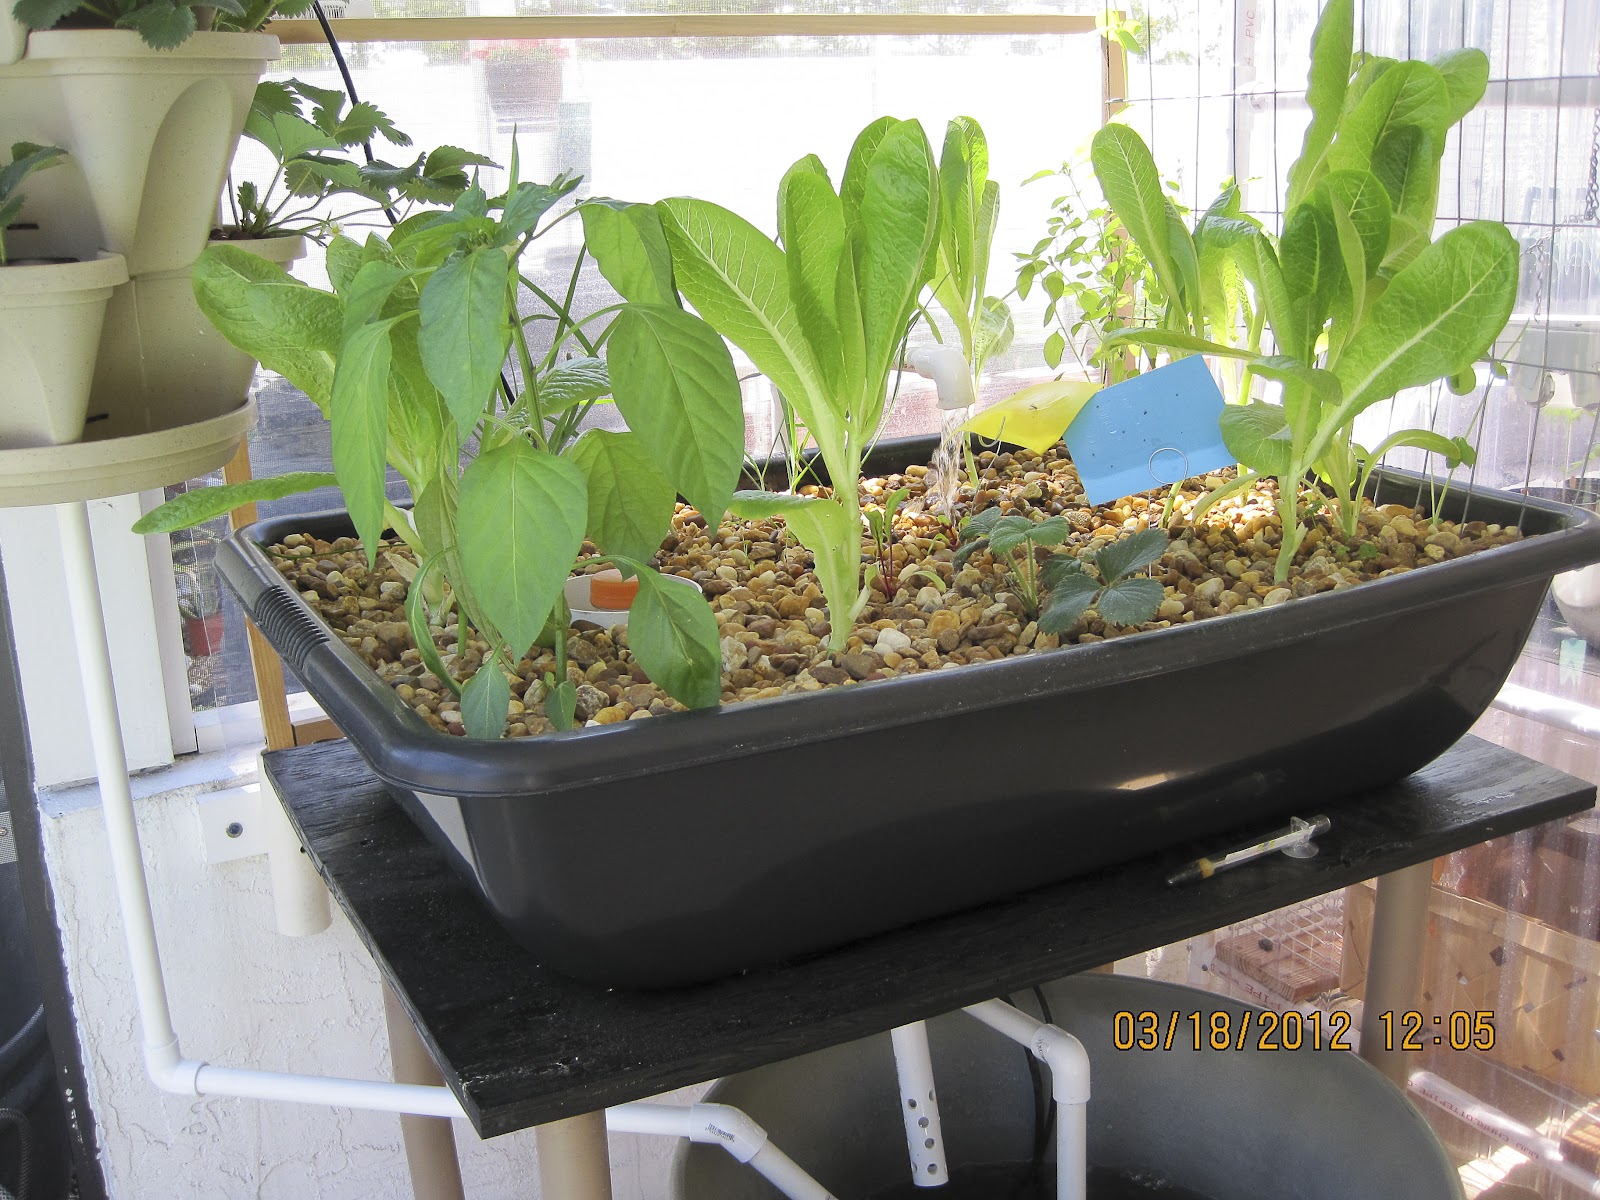
After a month of growth...we added strawberries to the mix!

This article is intended to give you a glance at our first system….please use the references below to further explore this grow method…  We will post a detailed description as we build our next system… Yes, we are already planning a bigger one! With Tilapia….and solar power…and….ah, to dream…

~Jerry

RESOURCES:
http://aquaponicscommunity.com/  Great forum - knowledgeable and helpful growers.
http://www.aces.edu/dept/fisheries/education/documents/barrel-ponics.pdf    Free eBook

http://www.backyardaquaponics.com    Plenty of info on basics with people ready to help!
Pin It

Sunday, March 11, 2012

DIY Sticky Traps

These save us bunches of $$$$!
Pin It
Maintaining an organic approach to gardening can be a maddening experience for gardeners and growers. Us included. This is especially true when it comes to aphids and leaf miners. We have found sticky traps do a fabulous job of keeping these marauders in check. Plus, sticky traps are a great early warning system because you can see the little buggers and get a heads up when they’ve decided to invade.  We use them regularly!

There are two colors that the most notorious pests seem to gravitate toward – yellow and blue. Yellow is an attractant for Whiteflies, adult Fungus Gnats, winged Aphids and many other unwanted garden visitors. Blue is an attractant to Thrips and Leafminers and people report great success when used around roses.
The whole do-it-myself thing started nagging at me. I wanted to make my own instead of buying pack after pack of the little treasures.  That is when I found a paint-on sticky coating made by Tanglefoot and scooped it up. I had some old file folders in yellow and blue and decided they would be firm enough for greenhouse sticky traps. However, I would suggest using plastic plates or plastic file folders for outside jobs. The only thing lacking was a way to hold them up or stake them in the ground. Jerry is ingenious and of course had an immediate solution! Here is how we did it…

Materials
Tangle-Trap Brush On Sticky Trap Coating
  • Tangle-Trap Brush On Sticky Trap Coating
  • Yellow or Blue paper or plastic squares
  • Galvanized Steel Wire (we had 19 gauge – lower the number higher the gauge)
  • Piece of ½” PVC pipe to help make the stakes

Steps

1.    Cut your yellow and blue material into squares (size and shape is up to you).

2.    Make stakes by cutting a section of wire and using the PVC tube to wrap a loop – three go-rounds should do it.


3.    Paint a thin (1/16”) coat of Sticky Trap Coating over front and back of square. (It really is sticky – so be careful of your hands/surfaces!).


4.    Slide card into loop and place in the garden.


It is recommended to place the traps about 3-7 feet apart within or just above plant foliage. When we need to hang sticky traps in the seedling greenhouse we use a binder clip and a bread tie to secure them.
Bottom line….these DIY sticky traps work and are much more economical for us! You can find Tangle-Trap Brush On Sticky Trap Coating for around $8 for an 8 ounce can and use any yellow or blue paper/plastic you find. I imagine we will get hundreds of sticky traps from this one can. When compared to approximately $1 a card for the pre-made sticky traps, I’d say this is the sustainable avenue. For the pocketbook anyway! J

Let us know if you give it a try and what your experiences were! We would love to hear from you!

~Joni
Pin It